Gatsby Posts

How to Connect Gatsby to WordPress

Gatsby is a blazing-fast website framework for React. It allows developers to build React-based websites within minutes.

WordPress

WordPress is a free and open-source content management system written in PHP and paired with a MySQL or MariaDB database. Features include a plugin architecture and a template system, referred to within WordPress as Themes.

Integrate Gatsby with WordPress

Install gatsby-source-wordpress package

npm install gatsby-source-wordpress

gatsby-config.js file

add the gatsby config file in the following code

 plugins: [
    ...
    {
        resolve: `gatsby-source-wordpress`,
        options: {
            // Specify the URL of the WordPress source
            baseUrl: `localhost:8888/wordpress`,
            protocol: `http`,
            // Indicates if a site is hosted on WordPress.com
            hostingWPCOM: false,
            // Specify which URL structures to fetch
            includedRoutes: [
              '**/posts',
              '**/tags',
              '**/categories'
            ]
        }
    }

Now connect your gatsby website and Wordpress.

Here is an example of the GraphQL API query

import React from "react"
import { graphql } from "gatsby"
import Layout from "../components/layout"
import SEO from "../components/seo"

export default ({ data }) => {
  return (
      {data.allWordpressPost.edges.map(({ node }) => (
        <div>
          <p>{node.title}</p>
        </div>
      ))}
  )
}
export const pageQuery = graphql`
  query {
    allWordpressPost(sort: { fields: [date] }) {
      edges {
        node {
          title
          excerpt
        }
      }
    }
  }

Hope this helps.

February 28, 20221 minuteVatsal SakariyaVatsal Sakariya
How to connect contentful CMS in the gatsby website

Gatsby

Gatsby is a blazing-fast website framework for React. It allows developers to build React-based websites within minutes.

Contentful CMS

Contentful is content infrastructure. Contentful lets you create, manage and distribute content to any platform. Unlike a CMS, Contentful give you total freedom to create your own content model so you can decide which content you want to manage.

Integrate Gatsby with Contentful

Install gatsby-source-contentful package

npm install gatsby-source-contentful

gatsby-config.js file

add the gatsby config file in the following code

plugins: [
    {
        resolve: `gatsby-source-contentful`,
        options: {
            spaceId: `your_space_id`,
            accessToken: `your_access_token`
        }
    }
]

Now connect your gatsby website and contentful CMS.

Here is an example of the GraphQL API query

import React from "react"
import { useStaticQuery, graphql, Link } from "gatsby"
import Layout from "../components/layout"

const Blog = () => {
  const data = useStaticQuery(
    graphql`
      query {
        allContentfulBlogPost{  //BlogPost collection name
          edges {
            node {
              title
              id
              slug
            }
          }
        }
      }
    `
  )
  return (
    <div>
      <p>
        <Link to="/">Go back to the homepage</Link>
      </p>
      <ul className="posts">
        {data.allContentfulBlogPost.edges.map(edge => {
          return (
            <li className="post" key={edge.node.id}>
              <h2>
                <Link to={`/blog/${edge.node.slug}/`}>{edge.node.title}</Link>
              </h2>

              <p className="excerpt">
                {edge.node.excerpt.childMarkdownRemark.excerpt}
              </p>
              <div className="button">
                <Link to={`/blog/${edge.node.slug}/`}>Read More</Link>
              </div>
            </li>
          )
        })}
      </ul>
    </div>
  )
}

export default Blog

Hope this helps.

October 12, 20212 minutesVatsal SakariyaVatsal Sakariya
How to make a Progressive Web App

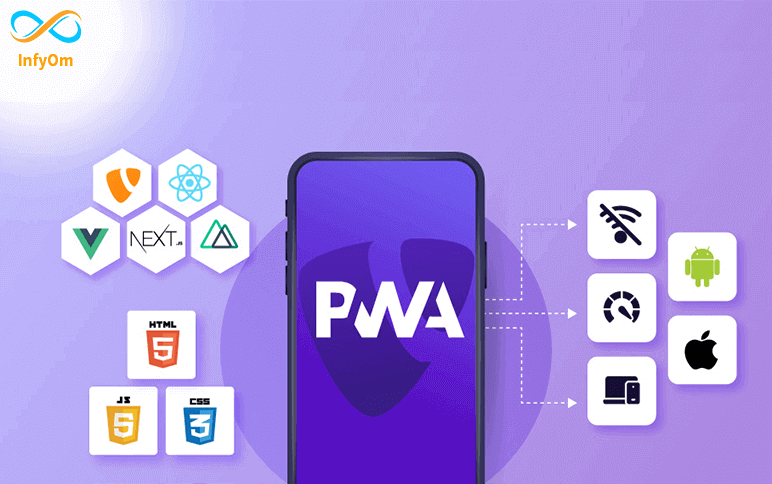
What is a PWA?

A Progressive Web App (PWA) is a hybrid of a regular web page and a mobile application. A PWA combines features offered by most modern browsers with the benefits of the mobile experience. They are built using standard web technologies, including HTML, CSS, and JavaScript. The functionalities include working offline, push notifications, and device hardware access and enabling creating user experiences similar to native applications.

How to make a PWA

Following Below steps

  • Create an app manifest.json file
  • Add it to your base HTML template
  • Create the service worker
  • Serve the service worker on the root of the scope you used in the manifest
  • Add a block to your base HTML template file
  • Site deploy in your server

Create an App Manifest

  • Add the following information in 'manifest.json'
 {
    name: `Name`,
    short_name: `Sort name`,
    start_url: `/`,
    display: `standalone`,
    icon:  `Favicon icon`,
    icons: [
       {
        "src": "icon by size",
        "sizes": "144x144",
        "type": "image/png",
        "purpose": "any"
      },
      {
        "src": "icon by size",
        "sizes": "192x192",
        "type": "image/png",
        "purpose": "maskable"
      },
      {
        "src": "icon by size",
        "sizes": "512x512",
        "type": "image/png",
        "purpose": "maskable"
      }
    ],
  theme_color: `Theme color`,
  background_color: `Background color`,
  ]
 }
  • Manifest.json file in add this type of code including name, short_name, start_url, display, icon, icons, theme_color, background_color.

Add the Manifest to Your Base HTML Template

  • Add the following line in yore 'index' file

Create offline.html as an Alias to index.html

By default, the service worker code below will render /offline.html instead of any resource it can't fetch while offline. Create a file at /offline.html to give your user a more helpful error message, explaining that this data isn't cached and the user is offline.

Create a Service Worker

  • Create one file in yore root (sw.js)
  • Link the sw.js file in the body tag

We have created some pages like

  1. Home page (/)
  2. Blog page (/blog)
  3. Contact information (/contact)
  4. Resume (/resume)
  5. offline.html
  • Add the code in your sw.js file
self.addEventListener("install", function(event) {
   event.waitUntil(preLoad());
});

 var preLoad = function(){
  return caches.open("offline").then(function(cache) {
    return cache.addAll(["/blog/", "/blog", "/", "/contact", 
 "/resume", "/offline.html"]);
    });
 };

 self.addEventListener("fetch", function(event) { event.respondWith(checkResponse(event.request).catch(function() 
  {
     return returnFromCache(event.request);
   }));
   event.waitUntil(addToCache(event.request));
  });

  var checkResponse = function(request){
   return new Promise(function(fulfill, reject) {
     fetch(request).then(function(response){
       if(response.status !== 404) {
         fulfill(response);
       } else {
         reject();
       }
     }, reject);
   });
  };

  var addToCache = function(request){
   return caches.open("offline").then(function (cache) {
     return fetch(request).then(function (response) {
       console.log(response.url + " was cached");
       return cache.put(request, response);
     });
   });
  };

  var returnFromCache = function(request){
   return caches.open("offline").then(function (cache) {
     return cache.match(request).then(function (matching) {
      if(!matching || matching.status == 404) {
        return cache.match("offline.html");
      } else {
        return matching;
      }
     });
   });
  };
  • Servicer worker file add your body tag

load the service worker file in

<script>
   if (!navigator.serviceWorker.controller) {
   navigator.serviceWorker.register("/sw.js").then(function(reg) {
         console.log("Service worker has been registered for scope: " + reg.scope);
     });
 }
 </script>

Last step

  • Deploy code in yore live site
  • Create lighthouse report and check PWA
July 28, 20214 minutesVatsal SakariyaVatsal Sakariya
Fix 404 while reloading Gatsby Website for dynamic client-only route

Last week, we run into a problem for one of the large Gatsby + ReactJS + Laravel projects in hosting which is hosted with Apache Webserver on Amazon AWS EC2. The problem we were facing was, for some reason, when we reload the Gatsby website, it was giving a 404 error page.

If you open a home page and then a normal visit then the website will fully function, but if you reload the page then it gives an error. And we found it happens when we are using Dynamic routing of React Route in Gatsby as per show in Gatsby documentation here.

Also, what we found, if we test the website build with gatsby serve then it works fine. But while using Apache, it behaves differently and we found that this problem has been faced by lots of people over the internet.

So what we came up with is, we used gatsby serve with an apache proxy. Here is how we did it,

Step 1 - Setup Project

As a first step, clone the project on the server and run a command, gatsby build to create a gatsby build.

Step 2 - Setup PM2 for Gatsby Serve

The next step that we need to do is run gatsby serve. But as you know, we can not run this command directly via console, because as you exit from the console, the command will be terminated.

So we will be using pm2 package, a NodeJS utility that is used to run nodejs apps.

For that, we will need to install pm2 globally. Run the following command to install it,

npm install pm2 -g

You can find other installation ways here if you need.

Once the installation has been done, let's run the gatsby serve command via pm2. For that run the following command from the gatsby project folder,

pm2 start gatsby --name my-web-app -- serve

where my-web-app you can replace with the name of your app.

Once, it's running, try to test it, if it's working correctly by opening the URL http://your-ip-address:9000/. Make sure, port 9000 is opened on your server for traffic.

Step 3 - Configure Apache

Once, gatsby serve is working and tested. The next step is to configure apache to proxy all port 80 traffic to port 9000.

For that, edit your apache conf file (or virtual host conf file), and add the following lines (or configure it to something like the following),

<VirtualHost *:80>
        ServerName my-web-app.infyom.com

        ServerAdmin webmaster@infyom.com

        ProxyRequests On
        ProxyPass / http://localhost:9000/
        ProxyPassReverse / http://localhost:9000/

        ErrorLog ${APACHE_LOG_DIR}/my-web-app.infyom.com.error.log
        CustomLog ${APACHE_LOG_DIR}/my-web-app.log combined

        ......
        # any other options below as per your need
        ......
</VirtualHost>

The next step you need to do is restart your apache server by,

sudo service apache2 restart

And then you can just open the URL https://my-web-app.infyom.com and it should work fine.

Bonus

New Deployment

Whenever you deploy a new code, you again need to run gatsby build and then pm2 restart my-web-app. Then only it will take new changes.

Troubleshooting

Sometimes, we found that we need to restart apache as well after the new deployment. so if you run into any trouble, then make sure to restart apache as well and it should solve the problem.

I hope it may help you to resolve your 404 problem.

July 16, 20213 minutesMitul GolakiyaMitul Golakiya
How to load dynamic blog in Gatsby Site

We have recently developed a site into the gatsby.

We have a blog site and hosted it on a different domain but now we want to move to one place at our main site. now, we have challenges for displaying dynamic blogs on the gatsby site.

Finally, I found that gatsby provides support to render dynamic blogs as static pages. when build is created that time fetches the blogs from the server and creates a static page for all the blogs.

Gatsby is a very good platform and manages such a kind of thing easily.

So, I will show you how to create static pages from the API response into the Gatsby site.

Here are the steps you need to follow correctly.

Steps 1

Create a one blog file where you want to load a blog in your design.

For an ex. I created a file blog/index.js inside the component directory and the code looks like this,

Steps 2

Open a file gatsby-node.js

Declare the const for the API URL at the beginning of the file.

const blogURL = 'http://blog-api.com/api/posts';

We need to create an instance of the node-fetch for fetching data from the API server.

const fetch = require(`node-fetch`);

Import the path for resolving the page while creating a static page.

const path = require('path');

See the example how to create a static page from APIs. code look's like,

exports.createPages = (async ({graphql, actions}) => {
    const blogs = await fetch(blogURL);
    blogs.data.forEach((blog) => {
        createPage({
            path: 'blog/' + blog.slug,
            component: path.resolve(`./src/components/blog/index.js`),
            context: {
                // Data passed to context is available
                // in page queries as GraphQL variables.
                slug: blog.slug,
                blog: blog,
            },
        })
    })

Now we are done, and you can access the blog page via slug.

November 12, 20202 minutesShailesh LadumorShailesh Ladumor
How to implement Google Analytics into Gatsby Site

We have recently developed a site into the gatsby. We want to add Google Analytics to the website.

So, this is the way we implemented Google Analytics in the Gatsby site.

Use Gatsby Google GTag Plugin

Gatsby has a plugin gatsby-plugin-google-gtag that be used to easily add Google Global Site Tag to your Gatsby site.

Install the package by running the following command:

npm i gatsby-plugin-google-gtag --save

Configuration

Once the installation is complete, you can now add this plugin to your gatsby-config.js:

Configure trackingIds and other options. Add this into the plugins array. Like,

module.exports = {
  // ...
  plugins: [
    {
      resolve: `gatsby-plugin-google-gtag`,
      options: {
              // You can add multiple tracking ids and a pageview event will be fired for all of them.
              trackingIds: [
                "GA-TRACKING_ID", // Google Analytics / GA
                "AW-CONVERSION_ID", // Google Ads / Adwords / AW
                "DC-FLOODIGHT_ID", // Marketing Platform advertising products (Display & Video 360, Search Ads 360, and Campaign Manager)
              ],
              // This object gets passed directly to the gtag config command
              // This config will be shared across all trackingIds
              gtagConfig: {
                optimize_id: "OPT_CONTAINER_ID",
                anonymize_ip: true,
                cookie_expires: 0,
              },
              // This object is used for configuration specific to this plugin
              pluginConfig: {
                // Puts tracking script in the head instead of the body
                head: false,
                // Setting this parameter is also optional
                respectDNT: true,
                // Avoids sending pageview hits from custom paths
                exclude: ["/preview/**", "/do-not-track/me/too/"],
              },
      },
    },
  ],
}

This plugin automatically sends a “pageview” event to all products given as “trackingIds'' on every Gatsby's route change.

If you want to call a custom event you have access to window.gtag where you can call an event for all products.

Check out this code.

typeof window !== "undefined" && window.gtag("event", "click", { ...data })

NOTE: This plugin only works in production mode! To test your Global Site Tag is installed and

You need to run the following command for firing events correctly.

gatsby build && gatsby serve

If you need to exclude any path from the tracking system, you can add one or more to this optional array.

November 22, 20202 minutesShailesh LadumorShailesh Ladumor
How to implement Mailchimp into Gatsby Site

We have recently developed a site into the gatsby. Basically, the contact us feature is common on all websites. and we are implementing Mailchimp because it's a very popular platform in the email market. So, I will show you how to set up a Mailchimp on the Gatsby site.

Using gatsby-source-mailchimp

Use your Mailchimp API key to download your campaigns into Gatsby’s GraphQL data layer! Install the package by running the following command: npm i gatsby-source-mailchimp --save. How to configure Once the installation is complete, you can now add this plugin to your gatsby-config.js, like so: Configure Mailchimp Key and add this {resolve: gatsby-source-mailchimp} into the plugins array. code looks like,

module.exports = {
  // ...
  plugins: [
    {
      resolve: 'gatsby-source-mailchimp',
      options: {
        // Avoid including your key directly in your file.
        // Instead, opt for adding them to .env files for extra
        // security ;)
        key: 'asd712jdas90122jdas90122jkadsd1-usXX',
        rootURL: 'https://usXX.api.mailchimp.com/3.0',
      },
    },
  ],
  // ...
}

This plugin was made out of a specific necessity, so it doesn't cover all of Mailchimp’s data sources, focusing only on campaigns.

This plugin provides a few options. you can refer here

Using .env variables to hide your key

If you don’t want to attach your API key to the repo, you can easily store it in .env files by doing the following:

Put this in your .env file

MAILCHIMP_KEY = 'asd712jdas90122jdas90122jkadsd1-usXX';

Put this in your gatsby-config.js file

require('dotenv').config({
  path: `.env.${process.env.NODE_ENV}`,
});

module.exports = {
  // ...
  plugins: [
    {
      resolve: 'gatsby-source-mailchimp',
      options: {
        key: process.env.MAILCHIMP_KEY,
        rootURL: '[https://usXX.api.mailchimp.com/3.0',](https://usxx.api.mailchimp.com/3.0%27,)
        // ...
      },
    },
  ],
  // ...
};
October 31, 20202 minutesShailesh LadumorShailesh Ladumor
How create a sitemap for your Gatsby site

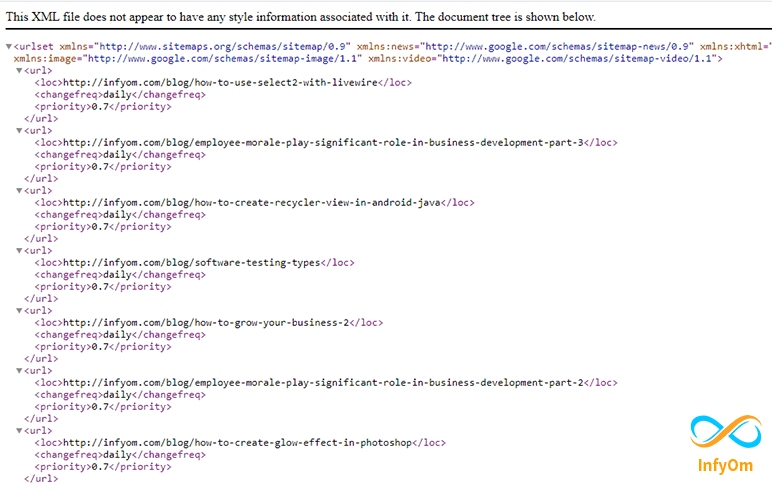
We are adding a sitemap in our all site pages for making sure search engines (such as Google) can find and crawl them all.

So, I will show you how to set a sitemap on the Gatsby site.

Using gatsby-plugin-sitemap

To generate an XML sitemap, you will use the gatsby-plugin-sitemap package.

Install the package by running the following command: npm install gatsby-plugin-sitemap

How to configure

Once the installation is complete, you can now add this plugin to your gatsby-config.js, like so:

Configure siteUrl and add this {resolve: gatsby-plugin-sitemap} into the plugins array. code looks like

module.exports = {
  siteMetadata: {
    title: `InfyOm Technologies`,
    description: `InfyOm Technologies`,
    keyword: `InfyOm Technologies`,
    author: `@gatsbyjs`,
    siteUrl: `http://infyom.com`
  },
  flags: {
    PRESERVE_WEBPACK_CACHE: true,
  },
  plugins: [
    {resolve: `gatsby-plugin-sitemap`},
  ],
}

Above is the minimal configuration required to have it work. By default, the generated sitemap will include all of your site’s pages.

You can exclude a path using the exclude option. you need to configure its

  • output (string) The file path and name. Defaults to /sitemap.xml.
  • exclude (array of strings) An array of paths to exclude from the sitemap.

code looks like,

module.exports = {
  siteMetadata: {
    title: `InfyOm Technologies`,
    description: `InfyOm Technologies`,
    keyword: `InfyOm Technologies`,
    author: `@gatsbyjs`,
    siteUrl: `http://infyom.com`
  },
  flags: {
    PRESERVE_WEBPACK_CACHE: true,
  },
  plugins: [
    {
    resolve: `gatsby-plugin-sitemap`,
    options: {
      output: `/some-other-sitemap.xml`,
        exclude: [`/category/*`, `/path/to/page`],
        }
    },
  ],
}

NOTE: This plugin only generates an output when run in production mode! To test your sitemap, run: gatsby build && gatsby serve

Now we are done and open the sitemap using your domain. for ex. https://abc.com/sitemap.xml

September 28, 20201 minuteShailesh LadumorShailesh Ladumor