Fix datatables_css or datatables_js not found or failed to open stream
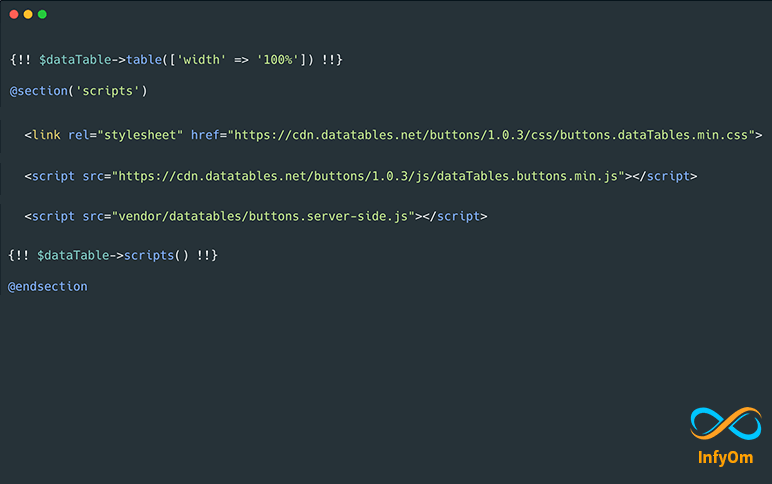
How to solve datatable_css and datatable_js not found issue after upgrading infyom generator to the latest…
AdminLTE Templates in mainstream development for Laravel Generator

Today we are going to take another major decision on our templates development for Laravel Generator. It’s around…
Introducing InfyOm Labs Blog
Greetings friends. Finally, the InfyOm Labs blog is here. This is my first blog, so, of course, this is my first post….