Retrieve count of nested relationship data in Laravel
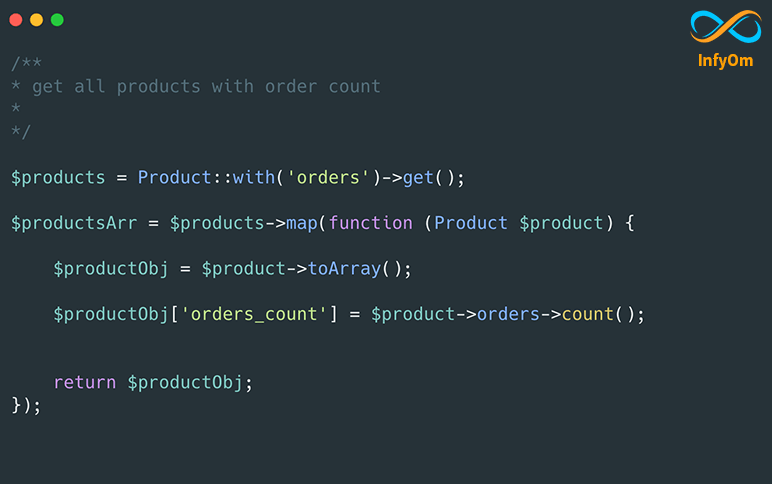
Recently in one of our client’s projects, we want to load the count of relation in laravel. But we do not want to…
Laravel Packages we use everyday at InfyOm
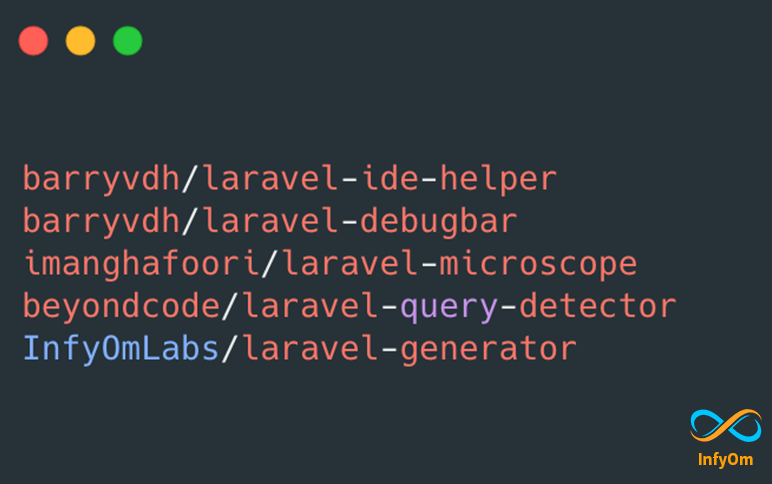
Lots of people ask me frequently, “Which are the laravel packages that you use in almost all projects?”…
How to use select2 with livewire

Most of the developers are facing a select2 style removing issue when livewire renders the component. We can resolve…
Using Common StatusTrait in Laravel in multiple models
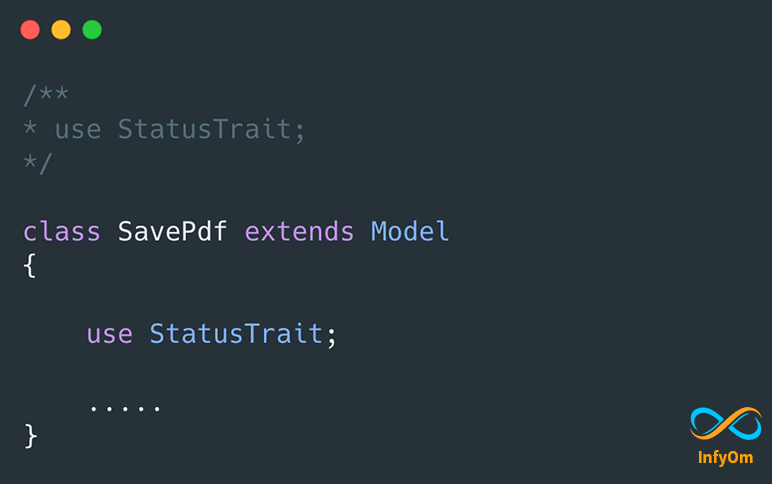
How to create a common Status Trait for the status field for different statuses of models in…
Use Laravel Debugbar to Improve Performance
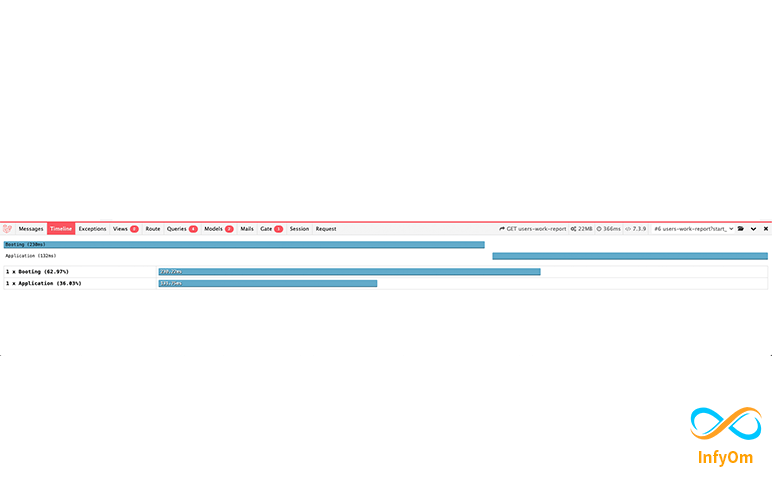
How to use the measure function of Laravel Debugbar to calculate the total execution time of function in…
How to Delete Record using ajax call with Laravel
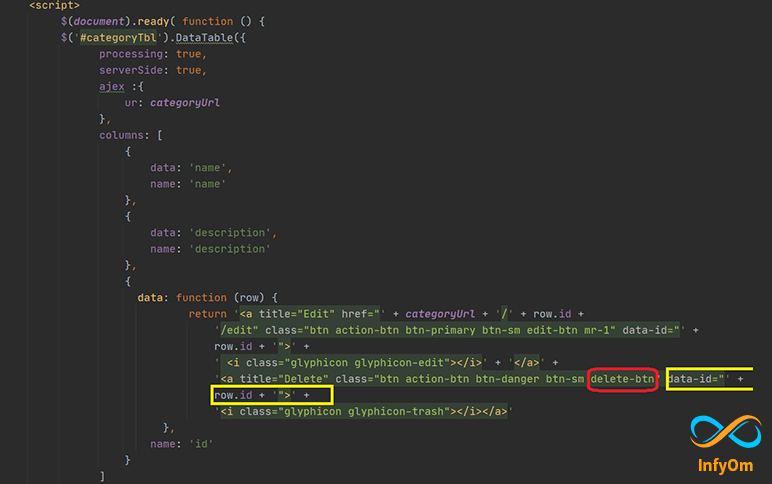
We work on projects with the admin panel every day. In which we mostly use data tables and we need to delete the record…
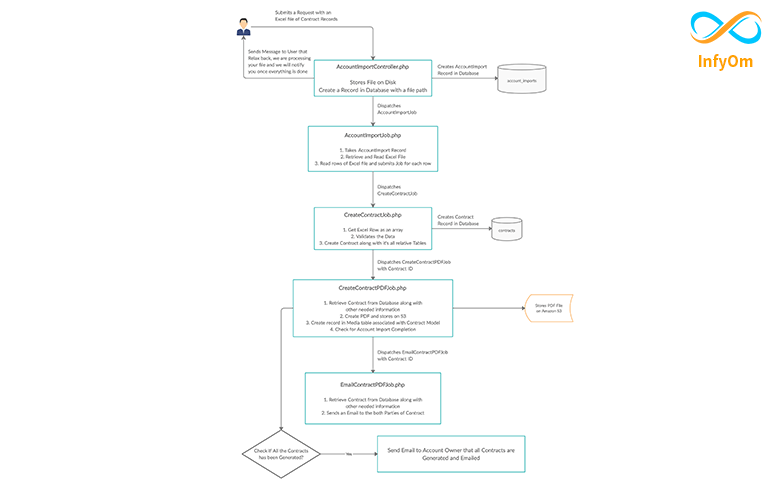
Efficient and Fast Data Import with Laravel Jobs & Queues
Recently Spatie released a brand new package for multi-tenancy called laravel-multitenancy. It comes with great support…
Setup Laravel Livewire with Basic Component Example
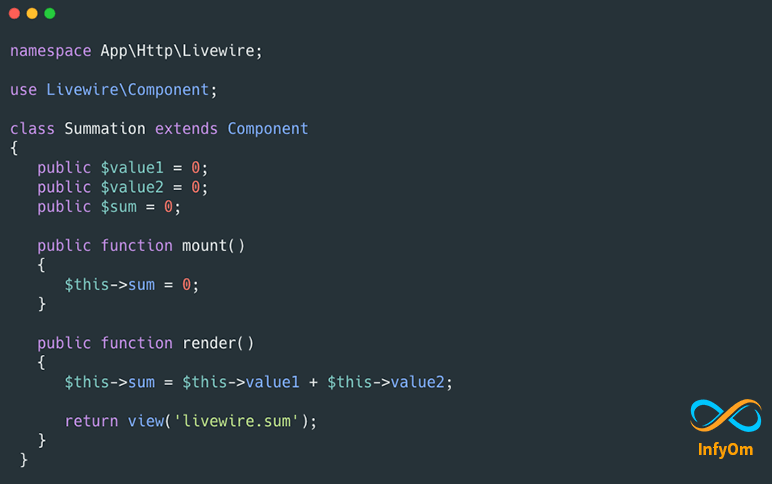
Laravel Livewire is used to build dynamic web pages that work without ajax or any javascript code. We can build dynamic…
How to remove public path from URL in Laravel Application
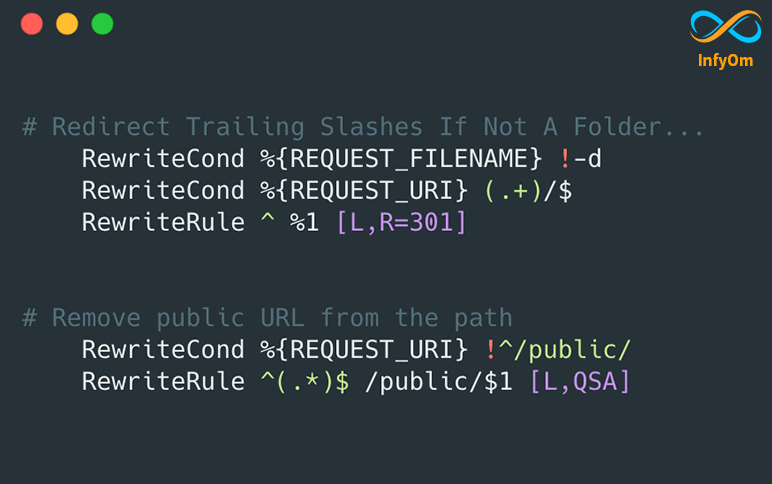
While hosting on the Laravel project on cPanel, the traditional problem that lots of developers get is, /public path is…
Custom path generation in Spatie Media Library while multi-tenant
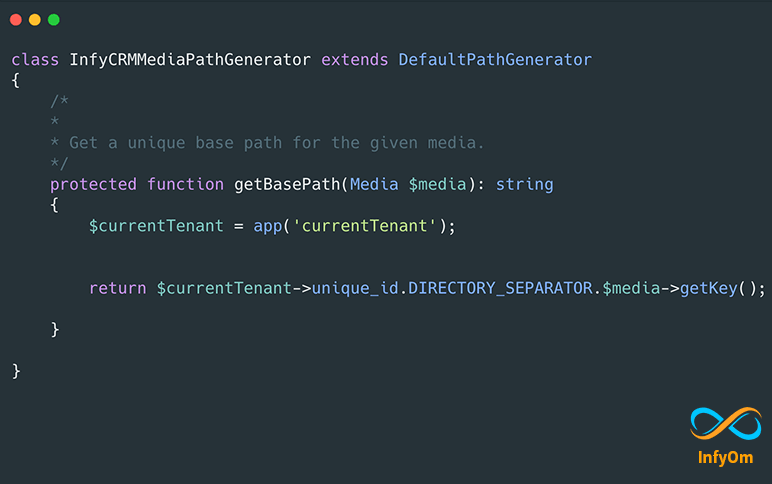
Recently we use Spatie laravel-multitenancy package in our of our client’s CRM project along with…