We are going to change the background of the photo with another texture.
Step:1 Create a new artboard
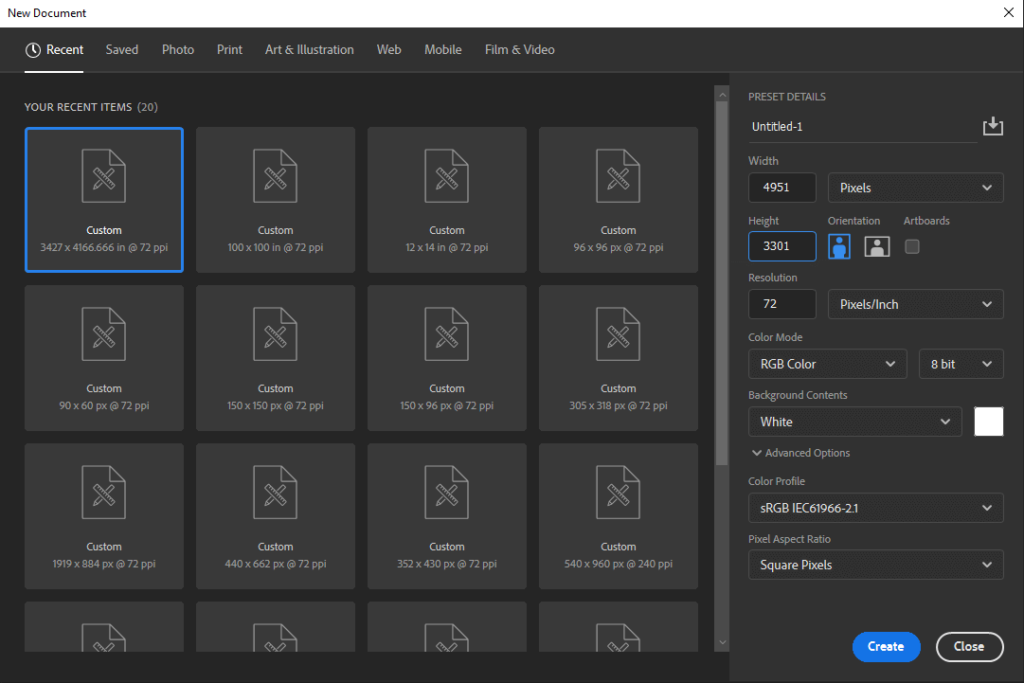
Press Ctrl+N for creating a new artboard and set its dimension as per requirement. For example, here we took 4951 x 3301 px.

Step:2 Set Image In artboard
Drag image from its location to the artboard.
Step:3 Select cropping portion of the image
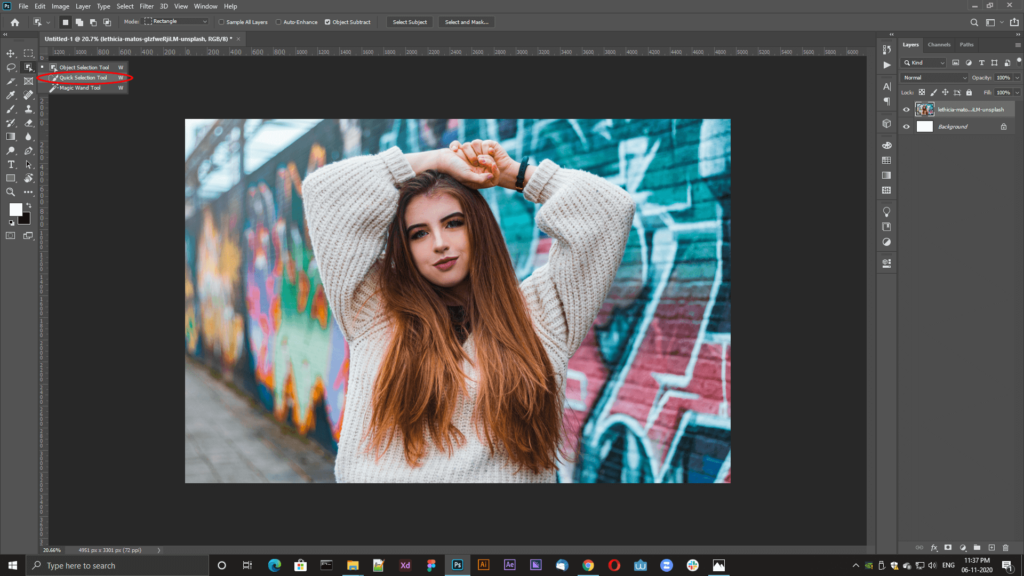
For the selection of an image, select the quick selection tool from the toolbar, and select a portion of the image which you want to crop.

Step:4 Select Refine edge
After perfect selection, select a refined edge tool.
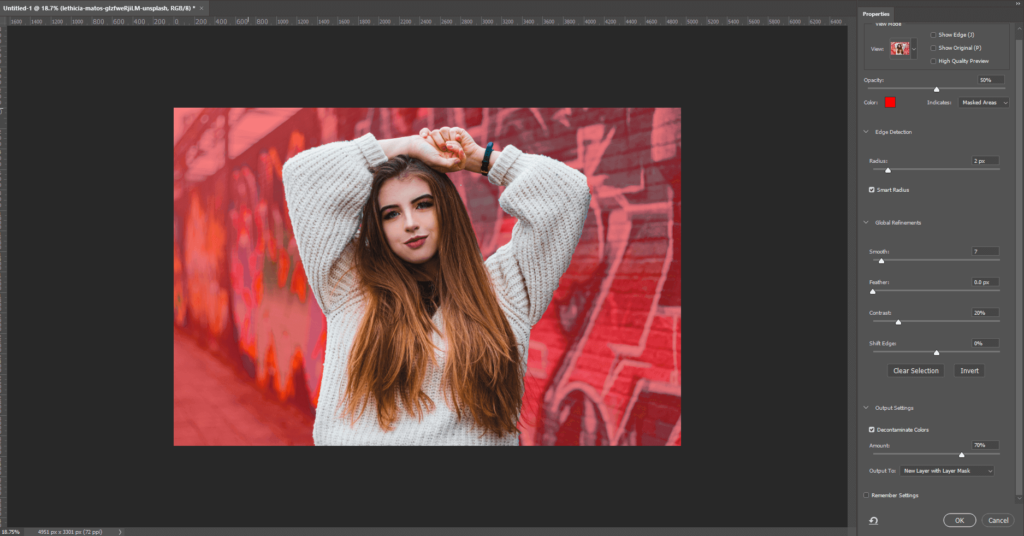
After this select overlay from view mode then from edge detection, select a smart radius.
Then set these properties:
- Set radius 1 to 2 px
- Increase smooth 6 to 7 px from global refinements
- Set contrast 20% in global refinements
- Check to decontaminate colors in output settings and set amount 70%
- Set new layer with a layer mask in output dropdown
Press OK.

Now our image will look like below:

Step 5: set new background
Select a new background that you want to set in the image from its location and set the artboard.
Now place our cropped image above this background and adjust as per requirement.


