Our Latest Blog Posts

latest-post

Stripe Connect is the fastest way to integrate payment into your marketplace.

In this tutorial we are going to integrate the stripe connect with Laravel.

To integrate the stripe connect you must need the stripe secret and the stripe key. You can get that credentials from your Stripe account.

So let's start integrating...

Installation

composer require srmklive/paypal:~2.0

Onboard the seller using Stripe connect

Define the route for onboarding the seller.

  Route::get('onboard-seller', [StripeController::class, 'onboard']);

Now on StripeController.php write the code for the onboarding link.

use Stripe\Stripe;
use Stripe\Account;
use App\Models\User;
use Stripe\AccountLink;

public function onBoard()
{
    $user = Auth::user();

    /** @var User $user */
    if (empty($user->stripe_on_boarding_completed_at)) {
        Stripe::setApiKey(stripeKey());

        if (empty($user->stripe_connect_id)) {
            /** @var Account $account */
            $account = Account::create([
                'type'         => 'express',
                'email'        => $user->email,
                'country'      => 'US',
                'capabilities' => [
                    'card_payments' => ['requested' => true],
                    'transfers'     => ['requested' => true],
                ],
                'settings'     => [
                    'payouts' => [
                        'schedule' => [
                            'interval' => 'manual',
                        ],
                    ],
                ],
            ]);

            $user->stripe_connect_id = $account->id;
            $user->save();
        }

        $user->fresh();

        $onBoardLink = AccountLink::create([
            'account'     => $user->stripe_connect_id,
            'refresh_url' => route('organization.dashboard'),
            'return_url'  => route('stripe.onboard-result', Crypt::encrypt($user->stripe_connect_id)),
            'type'        => 'account_onboarding',
        ]);

        return redirect($onBoardLink->url);
    }


    $loginLink = $this->stripeClient->accounts->createLoginLink($user->stripe_connect_id, []);

    return redirect($loginLink->url);
}

Please note that you have to generate routes for return and cancel URLs.

Once a merchant is successfully onboarded stripe will again redirect him to the return_url

Below you can find the code in which we managed the success callback.

public function onBoardResult($encodedToken)
{
    /** @var User $user */
    $user = User::whereStripeConnectId(Crypt::decrypt($encodedToken))->firstOrFail();

    $user->stripe_on_boarding_completed_at = Carbon::now();
    $user->save();

    return redirect(route('dashboard'));
}
June 02, 20231 minuteuserVishal Ribdiya

Posts

Cross-Browser Compatibility: Why it matters and how to test for it?

Cross-browser testing means to ensure these components function seamlessly across all targeted browser versions. You can use it to ensure HTML, JavaScript, Applets, AJAX requests, Flash, and web design elements all look and behave as intended on every individual browser type. The overarching goal of cross-browser testing is to provide uniformity by enabling testers to detect bugs that might prevent a site from displaying or functioning properly across various screen dimensions and browsers.

Why Is Cross-Browser Testing Important?

Although it’s one of the biggest time-grabbers for QA and development teams, cross-browser testing is essential for delivering the best experience possible to users. Browser vendors follow Open Web Standards, but they have their own interpretations of it. Since they each render HTML, CSS, and JavaScript in unique ways, thoroughly debugging your website’s source code is not enough to ensure that your website will look and behave as intended on different browsers (or different versions of a single browser). So it falls to web developers to abstract browser differences. Cross browser testing helps with that by pinpointing browser-specific compatibility errors so you can debug them quickly. It helps ensure that you’re not alienating a significant part of your target audience–simply because your website does not work on their browser-OS.

Which types of issues facing in cross-browser testing?

  1. Different JavaScript implementation
  2. Missing CSS resets
  3. Font size and image orientation mismatch
  4. No support for HTML5
  5. Inconsistent page alignment
  6. Layout incompatibility with browser
  7. Mismatches in frameworks or library versions

What Measures Are Involved in Cross-Browser Testing?

Compatibility testing includes everything, but you may not always have the time for that. To do it right, product teams constrain their testing with a test specification document (test specs) which outlines broad essentials—a list of features to test, what browsers/versions/ platforms to test on in order to meet the compatibility benchmark, test scenarios, timelines, and budget.You can categorise the features that will undergo testing like this:

  1. Base Functionality: To ensure that basic functionality works on most browser-OS combinations. For example, you could be testing to verify that:
  2. All dialogs boxes and menus are working as intended
  3. All form fields accept inputs after validating them correctly
  4. Website handles first-party cookies (and features like personalisation that are dependent on them) correctly seamless touch input for mobiles or tablets.
  5. Design: This ensures that the website’s appearance—fonts, images, and layout—matches the specifications shared by the Design team.
  6. Accessibility: Accounts for compliance with Web Content Accessibility Guidelines (WCAG) to enable differently-abled users to access the website.
  7. Responsiveness: Verifies that design is fluid and fits different screen sizes/orientations.
October 01, 20212 minutesauthorNayan Patel
Understanding of Employee's Value Circle

Being an HR professional it's too critical to engage each person in the organization. To engage employee HR need to transform the relationship (from arrange marriage to Love marriage)

Now the question is

How it would be possible as each and everyone has a different mindset in the organization?'

The obvious answer is

HR needs to understand the Employee's Value circle and use the factor to motivate and engage employees with the organization.

Again the new question born in the mind

What is the Employee Value circle?

The employee value circle is the combination of various employee's values which they want from the organization. After identifying the value we can easily decide the category of the value circle. The value category gives us the way to motivate and engage the employee and we can form a long-lasting relationship between organization and employee.

let's understand what is Employee Value circle is

Category-1

3RPM

1st R- Recognition 2nd R- Reward 3rd R Respect P- Promotion M- Motivation

We need to find out what is the thing from category 1 that works better for the particular employee.

Category-2

Money

If the person works for money then prepare the monetary plan to motivate the employee. you can use the bonus, incentives, vouchers, commission, cash card, etc. Sometimes you purchase something for them which they can consider monetary reward and gain income out of them. For instance shares.

Category- 3

Learning Opportunity

Many people in the organization are willing to learn and explore new things, to engage their organization can provide the learning platform for them.

Category- 4

Flexibility

If the person wants the flexibility to figure out the possibility and provide them, believe me, they will be happy and become more productive

At the first glance, it looks easy to do the Employee Value Circle survey but it's not Easy as ABC. HR professionals need to keep patience, keep an active approach all the time and observe everything about a particular person otherwise it will become a worthless, waste of time, and a waste of resources as well.

September 30, 20213 minutesauthorMariyam Bemat
Harmful Browser Security Threats: How to Avoid Them? -2

In our previous tutorial, we had seen the most common security threats. Let's see Main Seven Tips and its Recommendations on How You Can Protect Yourself from These Threats are mention below.

1. Saved Login Credentials

It is recommended not to save credentials in the browser. Instead, use password managers like Password Safe and KeePass to store credentials.

Password managers work through a central master password and help you keep your website passwords secure.

You can also set the administrator to access a saved login or URL, depending on your convenience and security reasons.

2. Removable Browsing History

Deleting the browser cache is a way to remove risky information, especially when engaging in confidential activities such as online banking. This step can be performed manually in the browser or set to automatic when the browser is closed. Another way to stay protected from this threat is to use Incognito or Private Browsing mode, where no saves can be harvested.

3. Disable Cookies

The best solution to the threat of cookies is to disable them when using your browser.

However, it is not exceptional, as many websites rely on cookies and thus get limited access to their functionality once they are turned off.

Disabling cookies may also result in annoying prompts. Getting rid of cookies on a periodic basis can help you protect your browser, beware of duplicate information by websites as a side effect of it.

4. Reduce Browser Cache by using Incognito Mode

Protection from such threats can be achieved through incognito browsing as well as by manually clearing the cache as per the requirement, especially after a sensitive browser search.

5. Look for Standard Java Configuration

Java is a widely used language for running Windows and other operating system-related code. It is designed in such a way that the applets inside it run in a separate sandbox environment, which helps prevent them from accessing other operating system components and applications. But more often than not, these vulnerabilities allow small applications to escape from the sandbox environment and cause the threat.

To avoid Java-related threats, search and choose a standard Java security configuration that works best with your browser as well as PC and deploy these configurations through a key source such as Group Policy.

6. Third-Party Plugins or Extensions

Browsers often have third-party add-ons or extensions provided for various tasks, for example, JavaScript or Flash for viewing or working with content. These are both from well-known high-quality dealers, however, there are various modules and add-ons from less legitimate sources and may not, however, offer a business-related benefit. For this type of threat, it is recommended to only allow business-related plugins and extensions as a key aspect of the official business approach, for example, to use the Internet and email. Depending on the browser(s) used in your link, explore ways to whitelist unwanted plug-ins or appropriate plug-ins, so that only those plug-ins can be served. Security modules are arranged for automatic updating or submission of new forms by focused components, (for example, Active Directory Group Policy or System Center Configuration Manager).

7. Ads Popping up and Redirects

Pop-up ads are well-known malicious ads that can be particularly confusing and difficult to work with. They regularly give false notifications, for example, they confirm that PC you have an infection and encourage you to submit their antivirus to activate it. Usually, malware is the thing that really ends up happening. These popups are questionable to close because often there is no X to do it like this.

The best alternative is to close the program completely or use Task Manager in Windows / Execution direction in Linux to close the application.

That's it. If you want to harm-free system, take these tips and apply them to your Web-application. It will help to protect from security threats.

September 26, 20213 minutesauthorBhumi Khimani
Android 11 Released: Top New Features

This is only part of what’s new, as there are over 100 features that serve app developers to further the entire Android experience. On Google's developer website, you can read about it all.

Media controls

While playing music, you can usually see a notification with music controls if you swipe down the notification drawer. However, now in Android 11, these controls are integrated into the Quick Settings menu. So, if you swipe to the top of the screen and with your Bluetooth and Wi-Fi tiles, you can see the music controls.

You can also choose which device will play music, which is accessible if you have Bluetooth earbuds or speakers connected. Drag the menu further down to see other options, such as the ability to select a song without opening the Music app.

Conversations and Bubbles

Google is finally unveiling its official implementation of the conversation bubbles. If you use Facebook Messenger on Android, you will already be familiar with this feature. This feature enables the conversation to stay in floating bubbles that can be moved around the screen and retrieved from within any application.

Google's own documentation says the section will be on "many phones," not all of them, so some manufacturers may choose to display it differently. In any case, apps will need to be updated to tell Android which notifications are conversations.

Screen recorder

Android finally has in-built screen recording. Screen recording in Android 11 is as easy as adding a quick setting tile and clicking it. Before you start recording, you can choose whether you need to record audio from your microphone or you can choose to show touch on the screen.

screen_recording_1

screen_recording_2

The new screen recorder can be accessed by tapping the 'Screen Record' tile in Quick Settings - if you don't see it on your device, press the Edit button in Quick Settings and drag the tile from the hidden options. Once you have it, just tap it to start recording.

Power button menu

Android 11 comes with a new power menu that enables you to quickly access all connected smart devices.

To reach the new menu just long-press the power button and control all connected devices like smart locks and thermostats with one click, without the need to open a lot of applications. This latest addition lets us feel like Google has finally brought smartphones to the smart home.

Notification history

Have you ever wondered which apps send the most push alerts to your phone? Did you accidentally clear the notification and aren't sure if you missed something important? If so, you'll love the new Android 11 Notification History page.

Do you ever refresh an instruction before you get a chance to read it? Right now, you don’t have to think that it was something important. Android 11 has launched Notification History which can be accessed by navigating to Settings> Apps & Notifications> Notifications> Notification History.

notification

Improved 5G Support

Android 11 includes enhanced developer support to help you reap the benefits of faster speeds and 5G networks. You can understand that when a user connects to a 5G network, they get an estimate of the connection bandwidth and check if the connection is metered.

September 21, 20213 minutesauthorVivek Beladiya
On-Page SEO : The Ultimate Guide[2021]

On-page are SEO types are used for ranking your webpage in google at no.1 position to get more traffic. That can take time but it's processed for a one-time setup than organically site rank in google and you get high-quality results.

Here you can get the ultimate guide about on-page SEO and you can apply this process to get results as you expect.

Factors for On-Page SEO

There are some factors that affect while process of on-page SEO.

So, let's get started,

1. Title

The title is the most important factor for the rank website in google. A page title should be attractive for the user if the user doesn't interest in your title then the user never read your blog post.

The title length should be 50 - 60 characters. Google can cut down longer versions of the title and your title doesn't see in google as you expect.

Here is the list for titles:

  • Use a keyword in the title
  • A Longer version of the keyword used in the title
  • CTA - call to action word use
  • Don't use stop words
  • Use your brand name in the title

2. Metatags

Metatags are also the most important factor for ranking. Metatags consist of a meta title, meta description, meta keyword, etc.

The length of the meta description should be generally 155 to 160 characters.

Metatags represent your whole blog in short. It should be attractive for user expectations.

Google can change your meta description and meta title user's query related but write meta description is required. And it should be relevant to your blog post.

3. SSL Certificate

Users can trust an only secure site if your site has no SSL certificate then it shows not secure so, user cannot trust on this site and don't provide information to this site.

Your site not should be HTTP but should be HTTPS using this gets user trust belongs to your site easily.

Example:

http://infyom.com/ - without an SSL certificate

https://infyom.com/ - with SSL certificate

4. Responsive Website

The website should be mobile-friendliness if not then google can not index a particular webpage or site.

5. Navigation

Navigation of your website is should be easy for users so users can spend more time on your site.

Users can easily go from one page to another page using simple navigation.

You can use a breadcrumbs snippet for easy navigation.

6. Page Loading Speed

Core web vitals plays an important role in page loading speed. Low page loading speed means users can more time spent on a website.

Key factors:

  • Images compression
  • Compress javascript and CSS files
  • Cashed javascript and CSS files
  • Light theme

7. Text Visibility

Another important factor is text visibility. Text on your site should be visible to the user. Not used word to white text in the white background is not visible for the user.

8. CTA - Call to Action

Use call-to-action words in your content for getting to user interaction with your content.

Ex. Buy Now, 2 Days left only, Create an account, Free e-book, Explore, Join now, Discover, etc. all are call-to-action words that use in your content to increase user interaction with your content.

9. Img alt text

Always use alt text for every image that is in content. Alt text should be relevant to your image.

Don't use repeat alt text in the same content.

10. Internal Linking

Your site pages should be interlinking with each other for easy navigation. Google can easily understand your site structure if you use interlinking of all pages with each other.

Google can easily crawl them and indexed them in SERP. Using this users can spend more time on your website and you can get a rank in google.

11. External linking

You can do link to high domain authority web pages on your page. This is also a ranking factor in on-page SEO.

Not limit to external linking to your web pages.

12. URL Structure

Use an easy URL structure for your web pages. Don't use a long-form of URL structure.

Conclusion:

All factors are important in on-page SEO points of view so, follow these steps to get a higher ranking in google.

September 16, 20212 minutesauthorMilan Gangani
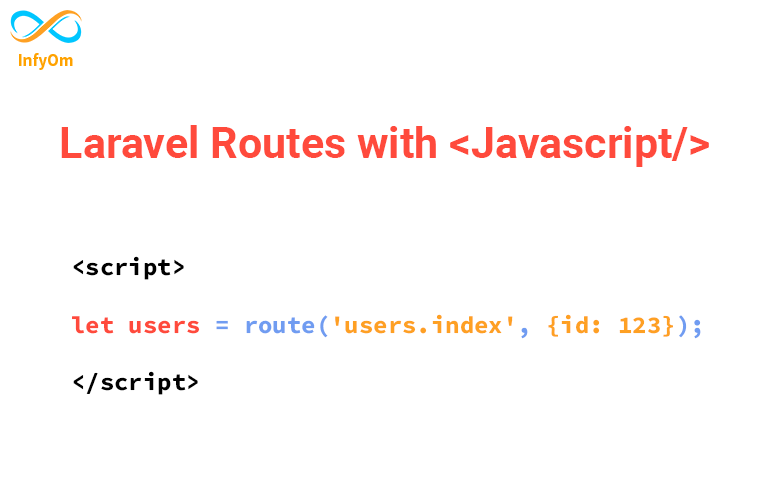
How to use laravel routes with Javascript / JQuery ?

Generally, we can use laravel routes into its blade files, but what do we have to do when we want to use routes in javascript? is that possible to use laravel routes into javascript?

Yes, now you can use laravel routes into laravel, thanks to Tighten/Ziggi package.

In this tutorial, we will learn how we can use laravel routes into javascript, so let's get started.

Install the package

composer require tightenco/ziggy

Update your main layout file

Add the @routes Blade directive to your main layout (before your application's JavaScript), and the route() helper function will now be available globally!

E.g (app.blade.php)

... ... @routes .. ..

Usage

// routes/web.php

Route::get('users', fn (Request $request) => /* ... */)->name('users.index');

// app.js

route('users.index'); // 'https://url.test/users'

So this is how its works, so simple right :)

You can get more information about this package from here

Kepp connected to us to get the latest laravel information.

January 03, 20223 minutesauthorVishal Ribdiya
How to Develop Effective Communication Skills to Get and Keep Clients

Introduction

Effective communication is a tool for achieving your business goals and the essence of your business. Are you ever unsure about what a customer really wants? Have you ever forgotten what you or a client promised because you did not keep a good record of your interactions? If so, your communication with customers can be improved. Here are some tips to improve communication, both in writing and orally, especially with potential and current customers.

Respond quickly

To provide us with great customer service, we need to try to return email and phone calls within an hour, if possible. Doing so confirms your professionalism and tells the client that it is easier to work with you. It shows that you care about the collar business.

Remember to ask the client for feedback

You can ask them this time if you can help with future projects. Or, just say you're looking forward to working with them again.

Be very specific about the documentation of the project terms

Ask if you don't know, and document everything in writing. For example, set up an appointment to communicate with customers so you can be more prepared when they call. I sometimes screen incoming calls, let them go to voicemail, and then call back as soon as I'm ready to say what I want to say. If you are following up with a client, ask if you can call back at a specific time, or offer an alternate time to talk.

Verify by recording everything in writing

Even if you agree to something over the phone, always send an email with details that the client can verify. Ask, don't assume. If your invoice is not paid, or if you are unsure, just ask.

Listen

Both face-to-face and written communication are important. While you can personalize your emails to coworkers and/or employees, a quick "I hope you all had a good weekend" email at the beginning of the message can make the individual and the recipient more appreciative.

Respect

You will be more open to communicating with people who show respect for you and their ideas. Using the person's name, making eye contact, and actively listening when a person speaks will compliment the person. On the phone, focused on avoiding interruptions and investing in conversations.

September 10, 20212 minutesauthorAnkit Kalathiya
What is Agile Testing Methodology & How it Works?

Agile testing is a software testing process that follows the principles of agile software development. Agile testing methodology aligns with iterative Development Methodology in which requirements develop gradually from customers and testing teams. The development is aligned with customer requirements.

The agile testing process is a continuous process rather than being sequential. The testing begins at the start of the project and there is ongoing integration between testing and development. The common objective of agile development and testing is to achieve high product quality.

Agile Testing Methods

Behavior Driven Development

Behavior Driven Development (BDD) improves communication amongst project stakeholders so that all members correctly understand each feature before the development process starts. There is continuous example-based communication between developers, testers, and business analysts.

Acceptance Test Driven Development

ATDD focuses on involving team members with different perspectives such as the customer, developer, and tester. Three Amigos meetings are held to formulate acceptance tests incorporating perspectives of the customer, development, and testing. The customer is focused on the problem that is to be solved, the development is focused on how the problem will be solved whereas the testing is focused on what could go wrong. The acceptance tests are a representation of the user’s point of view and describe how the system will function. It also helps to verify that the system functions as it is supposed to. In some instances acceptance tests are automated.

Exploratory Testing

In this type of testing, the test design and test execution phase go hand in hand. Exploratory testing emphasises working software over comprehensive documentation. The individuals and interactions are more important than the process and tools. Customer collaboration holds greater value than contract negotiation. Exploratory testing is more adaptable to changes. In this testers identify the functionality of an application by exploring the application. The testers try to learn the application, and design & execute the test plans according to their findings.

Agile Testing Life Cycle

The agile testing life cycle includes the following 5 phases:

  1. Impact assessment - Gather input from stakeholders and users, this will act as feedback for the next deployment cycle.

  2. Agile Testing Planning - All stakeholders come together to plan the schedule of the testing process, meeting frequency, and deliverables.

  3. Release Readiness - In this stage, we review the features that have been developed/implemented are ready to go live or not.

  4. Daily Scrums - Daily standup meeting includes everyday meetings to catch up on the status of testing and set the goals for the whole day.

  5. Agility Review - Weekly review meeting with stakeholder meeting to review and assess the progress against milestones.

Conclusion

Agile testing not only facilitates the early detection of defects but also reduces the cost of bugs by fixing them early. This approach also yields a customer-centric approach by delivering a high-quality product as early as possible.

September 09, 20213 minutesauthorNayan Patel