Laravel UPCItemDB Package
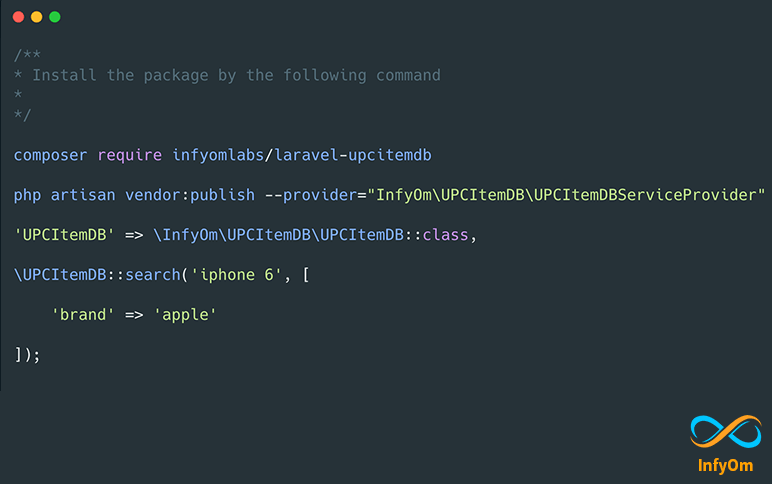
We have been working on an inventory system for one of our clients for a long time and recently, what we needed was to…
How to Create Laravel Facade and Simplify Code
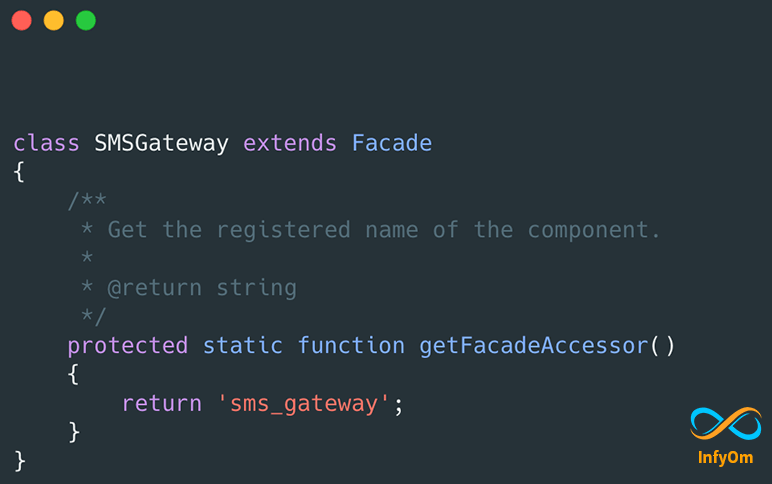
Last month, I started training in one company where I am giving Laravel Training to around 15-20 PHP Developers, where…
Laravel App – Code Optimizations Tips
Last month we started working on one of our internal project called InfyTracker, which we were planning to use as a…
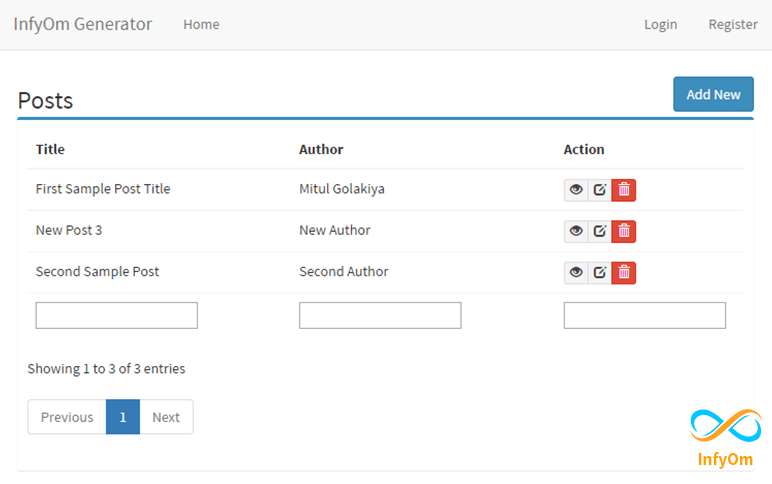
Show Relationship Data in Laravel DataTables
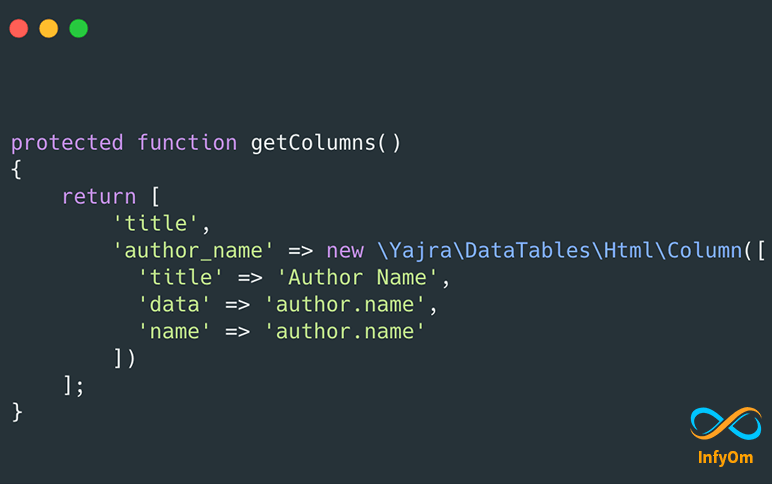
Lots of people asked a question on our Github Repo about how they can display relationship data into index while using…
How to use Datatables in InfyOm Laravel Generator
InfyOm Laravel Generator comes with two possible choices for a table in the index view. Native table with blade…
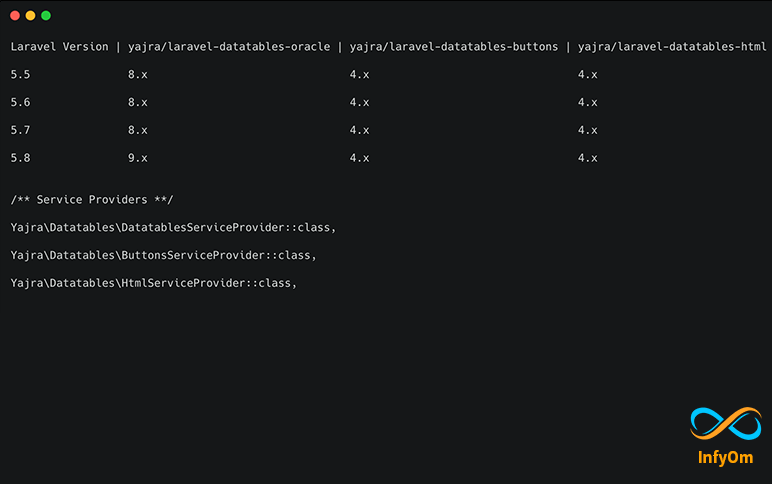
Introducing Laravel 5.8 support to InfyOm Laravel Generator

Introducing Laravel 5.8 support to InfyOm Laravel Generator with more cleaner Repository Pattern Laravel 5.8 just…
Integrate Amazon SNS into PHP Laravel to Send and Receive Messages
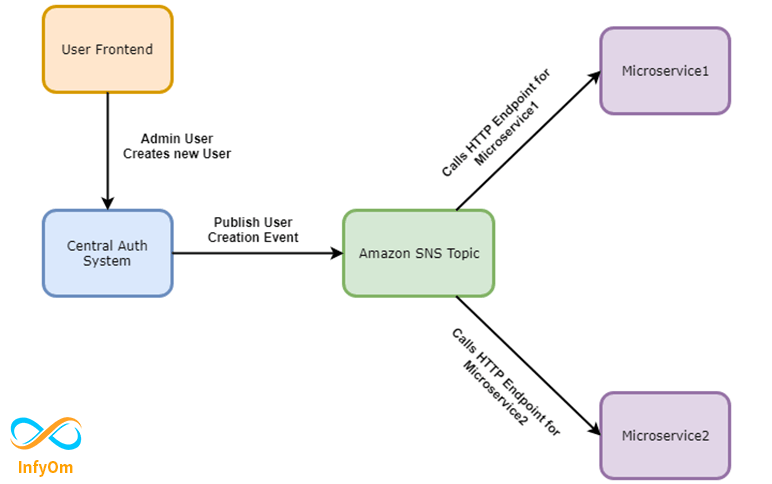
How to integrate Amazon SNS in the laravel app to send and receive messages via publishing and…
Multi Column Search box in Datatables with InfyOm Laravel Generator
UX and UI designs are similar and are often used interchangeably. In fact, these two words have completely different…
Display Images in DataTables with Laravel
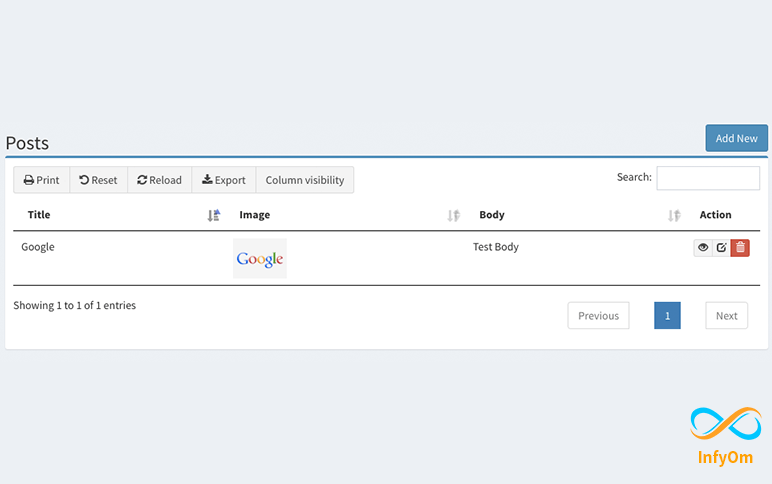
How to display an image in DataTable with laravel yajra datatable with InfyOm laravel…
24th Sep 2016 InfyOm Laravel Generator Release

Another minor update release for InfyOm Laravel Generator with some enhancement for datatables and few bug fixes. This…